
Meet Archivist Maren
A Hylian scholar dedicated to cataloging every shrine, weapon, recipe, and secret across Sky, Surface, and Depths. She travels with a worn Purah Pad and an encyclopedic knowledge of Hyrule.

Maren
Maren's Poses
Hero Stance
Full body — greets you on the landing page and 404
Portrait
Appears in tip cards, sidebars, and section intros

Thinking
Strategy sections, shrine guides, and puzzles
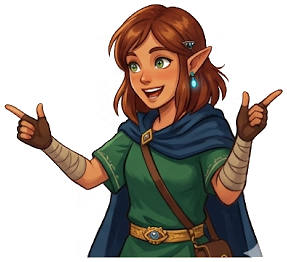
Presenting
Feature callouts, new content, and recommendations
Walk Animation
Maren wanders the 404 page, always exploring — just like a real Hylian scholar.
down
left
right
up
Maren's Knowledge Base
225 tips across 16 categories — delivered contextually based on the page you're viewing.
shrines
18 tips
Hidden Shrine Entrances
Many shrines in the Depths sit directly below their surface counterparts. Check your surface map and dig straight down.
Rauru's Blessing = External Puzzle
If a shrine gives Rauru's Blessing with no puzzle, the real challenge was reaching it. Check the surrounding area for the actual test.
Use Ascend Liberally
Stuck in a shrine? Look up. Ascend can bypass entire sections of puzzles if there's a ceiling above you that leads to the goal.
Crystal Shrines
Green crystal shrines require you to carry the crystal back to the shrine entrance. Use Ultrahand to attach it to a vehicle or throw it downhill.
Shrine Sensor
Upgrade your Purah Pad at the Hateno Ancient Tech Lab to get the Shrine Sensor. It beeps when you're near an undiscovered shrine.
Combat Shrines
For combat trial shrines, fuse the strongest materials you have. Silver enemies in shrines have predictable attack patterns — learn the dodge timing.
Recall Everything
Moving platforms and falling objects can be reversed with Recall. This is the key to many shrine puzzles — if something moved, Recall it.
Light of Blessing
Every 4 Lights of Blessing can be exchanged at a Goddess Statue for a Heart Container or Stamina Vessel. Prioritize stamina early on.
Proving Grounds Shrines
Proving Grounds strip all your gear and force you to fight with found weapons. Look around the arena for hidden chests and environmental advantages before engaging.
Shrine Chest Indicator
A shrine with a treasure chest icon on the map means you opened the chest. No icon means there is still a chest inside you missed — go back and find it.
Water Shrine Shortcuts
In water-themed shrines, freeze water with Ice Fruit arrows or Splash Fruit to create platforms. Cryonis is gone, but creative fusing fills the gap.
Ball-and-Track Puzzles
Use Ultrahand to grab balls and guide them along tracks manually. You do not always need to solve the intended physics puzzle — brute force works.
Blessing Shrine Farming
Blessing shrines still give a Light of Blessing with zero puzzle effort. Seek them out first if you need quick heart or stamina upgrades early in the game.
Ultrahand Bridge Building
Many shrines with gaps can be solved by grabbing metal plates or loose objects and laying them across as bridges. Think construction before physics.
Shrine Fast Travel Network
Completed shrines act as fast travel points. Prioritize shrines near remote areas like Hebra or Gerudo Desert to build a travel network across the map.
Wind Puzzle Shortcuts
In shrines with wind currents, attach a fan to a raft or platform instead of solving the intended wind routing. Your own Zonai devices work inside shrines.
Fire Shrine Safety
For fire-themed shrines, equip Flamebreaker armor before entering. The fire hazards inside can drain hearts fast if you are unprotected.
Multiple Solutions Exist
Almost every shrine has an unintended shortcut. If you think a solution is too simple, it probably still works. The game rewards creative problem-solving.
combat
18 tips
Flurry Rush Timing
Dodge at the last possible moment to trigger Flurry Rush. Each enemy has different attack speeds — practice on weaker variants first.
Fuse for Damage
Fusing strong monster parts to weapons dramatically increases damage. A Silver Lynel Horn fused to any weapon adds +55 attack power.
Headshots Matter
Bow headshots deal double damage and stun most enemies. Use bullet-time by drawing your bow mid-air for easier aiming.
Elemental Advantages
Fire enemies are weak to ice, ice enemies to fire. Shock enemies are stunned by water + electricity. Use the environment.
Use Riju's Lightning
Riju's lightning sage ability hits all enemies near your charged attack. Perfect for clearing camps — charge an attack in the middle of a group.
Shield Surfing in Combat
You can shield surf into enemies to knock them down, then follow up with a combo. Works especially well downhill.
Sneakstrike Damage
Sneakstrikes deal 8x damage. Crouch behind an enemy and press attack for a devastating hit. Stack this with high-damage fused weapons for one-shot kills.
Throw Materials Mid-Fight
Press R to throw held materials at enemies. Chu Chu Jellies explode on impact with elemental effects. White Chu Chu Jelly freezes enemies solid.
Lynel Farming
Lynels drop the best fuse materials in the game. Mount them after a headshot stun — mounted attacks do not consume weapon durability.
Perfect Guard Timing
Press A with your shield up at the exact moment an attack lands to perform a Perfect Guard. This reflects Guardian beams and staggers most enemies.
Muddlebud Chaos
Fuse a Muddlebud to an arrow and shoot it into a group of enemies. The hit enemy will fight its allies, letting you pick off survivors.
Bomb Flower Efficiency
Bomb Flowers fused to arrows are devastating against groups. Aim at the ground between enemies rather than at one enemy to maximize splash damage.
Charged Attack Spin
Hold the attack button to charge a spin attack. Two-handed weapons have a devastating wide spin that hits all enemies in a circle. Great for crowd control.
Gibdo Elemental Weakness
Gibdos are immune to physical damage until you hit them with fire, ice, or shock first. One elemental arrow strips their husk, then they die in one or two melee hits.
Gleeok Multi-Head Strategy
Each Gleeok head must be stunned simultaneously. Use bullet-time to quickly shoot all three heads with arrows. When all three are stunned, the Gleeok falls and you can melee.
Use Recall on Projectiles
Enemy-thrown rocks and boulders can be sent back with Recall. Time it right and the enemy takes its own damage. Works on Hinox tree throws too.
Stasis Lock Combo
Use Recall on an enemy to freeze it momentarily, then land multiple hits. The accumulated damage launches the enemy when the freeze ends.
Campfire Updraft Trick
Drop wood and flint near enemies, light a fire, then use the updraft to enter bullet-time. You get free slow-motion headshots while enemies are confused.
exploration
16 tips
Skyview Towers First
Activate all 15 Skyview Towers early. They reveal the map AND launch you into the sky for paragliding across huge distances.
Stamp Your Map
Use map stamps liberally. Mark caves, treasure chests, rare material spawns, and anything you want to return to later.
Horses Are Fast Travel
Register horses at stables and use the horse whistle to summon them. With the Towing Harness, horses can pull Ultrahand creations.
Caves Hide Everything
There are 147 caves in Hyrule. Each contains a Bubbulfrog (for Koltin's rewards), plus rare ores, enemies, and sometimes shrines.
The Hoverbike
Two fans + a steering stick = the hoverbike. It's the most efficient vehicle in the game. Save it as an Autobuild favorite.
Sky Island Chains
Sky Islands often form chains you can follow. Look for launch pads, trampolines, and glide paths between islands.
Korok Seed Shortcuts
Koroks that need to be reunited with their friend can be moved using vehicles. Attach the Korok to a flying machine and deliver them instantly.
Well Hunting
There are 58 wells scattered across Hyrule, each with a hidden underground area. Many contain treasure chests, Bubbulfrogs, or secret paths to other locations.
Rainy Day Climbing
Rain makes climbing nearly impossible. Wear the Froggy Armor set (bought from Koltin after trading Bubbul Gems) for slip-resistant climbing in wet weather.
Use the Wind
Open your paraglider facing into a strong updraft or near a campfire to gain massive altitude. Combine this with Tulin's gust ability for even more distance.
Cherry Blossom Trees
Drop a fruit offering at a cherry blossom tree to summon Satori, who reveals all nearby caves, wells, and Bubbulfrogs on your map. Invaluable for completionists.
Travel Medallion Placement
Place the Travel Medallion at hard-to-reach locations you visit often — like a Depths mining spot or a remote sky island. It acts as a custom fast travel point.
Blupee Rupee Farming
Blupees (glowing blue rabbits) drop rupees when hit. They appear at night near caves and cherry blossom trees. Hit them multiple times before they vanish for maximum rupees.
Paraglider Stamina Management
Close and reopen your paraglider in mid-air to drop slightly and reset your glide angle. This extends horizontal distance when stamina is running low.
Hudson Sign Locations
Addison and his Hudson Construction signs appear at fixed locations across Hyrule, often near roads and stables. Look for his distinctive hat from a distance to spot him.
Night-Only Discoveries
Certain enemies, materials, and events only appear at night. Stalnox, Stal enemies, luminous stones glowing, and some NPCs only show up between 9 PM and 5 AM.
cooking
16 tips
Single Ingredient = Max Duration
Cooking one ingredient gives the same effect duration as cooking five. Save ingredients by cooking single-item dishes for buffs.
Blood Moon Cooking
Cook during a Blood Moon (between 11:30 PM and midnight) for guaranteed critical success — extra hearts, duration, or effect strength.
Don't Mix Effects
Mixing two different effect ingredients (e.g. speed + stealth) cancels both effects. Stick to one effect type per dish.
Hearty = Full Heal
Any dish with a Hearty ingredient fully restores all hearts AND adds temporary bonus hearts. Hearty Durian is the best healing item.
Elixirs Need Bugs
Elixirs require a critter (bug, frog, lizard) + monster parts. The critter determines the effect, monster parts determine duration.
Frozen and Roasted Food
Drop food near fire to roast it, or in cold areas to freeze it. Roasted food heals more than raw. Frozen food gives heat resistance.
Dragon Horn Shards
Add a Shard of Dragon Horn to any dish to boost the effect duration to 30 minutes. This works for attack, defense, speed, stealth, and resistance buffs.
Fairy Cooking
Cooking a single fairy creates a dish that restores a large number of hearts. But keeping fairies in your inventory lets them auto-revive you on death — usually more valuable.
Endura Carrots
Cook an Endura Carrot for a dish that fully restores your stamina wheel plus adds temporary bonus stamina. Found near Great Fairy Fountains and on Satori Mountain.
Monster Cake Recipe
Combine Tabantha Wheat, Cane Sugar, Goat Butter, and a Monster Extract for Monster Cake. Monster Extract randomizes the result — sometimes amazing, sometimes terrible.
Crit Cooking Mechanics
Critical cooking happens randomly and boosts effect strength, duration, or heart recovery. Adding a Star Fragment guarantees a critical success on any recipe.
Dubious Food Prevention
Dubious Food results from mixing incompatible ingredients like monster parts with food. It heals a single heart and wastes your ingredients. Keep monster parts for elixirs only.
Five Mighty Bananas
Cook five Mighty Bananas together for a Tough Banana meal that gives Attack Up Level 3 for several minutes. One of the easiest high-tier attack buffs to craft.
Sundelion Meals for Depths
Cook Sundelions into meals before entering the Depths. Sundelion dishes are the only food that restores Gloom-damaged hearts, making them essential for underground survival.
Sell Gourmet Meat Skewers
Cook five Raw Gourmet Meat together for a Meat Skewer worth 490 rupees. Gourmet Meat drops from large animals in cold regions. This is one of the best early rupee farms.
Portable Cooking Pots
Zonai Portable Pots let you cook anywhere without finding a cooking pot. Stock a few from Zonai Dispensers so you can cook on the go during long exploration runs.
depths
16 tips
Lightroots Mirror Shrines
Every Lightroot location in the Depths directly mirrors a shrine location on the surface. Use your surface shrine map to navigate the Depths.
Brightbloom Seeds
Throw Brightbloom Seeds to light up the Depths. Giant Brightbloom Seeds illuminate a massive radius. Stock up before descending.
Gloom Recovery
Gloom damage reduces your max hearts. Recover by eating Sundelion dishes, standing in light, or returning to the surface.
Poe Farming
Collect Poes (blue flames) in the Depths to trade with the Bargainer Statues for exclusive armor and items. They're everywhere — use Sensor+.
Yiga Clan Bases
The Yiga Clan has outposts throughout the Depths. Defeat them to unlock Yiga armor schematics for Autobuild.
Mine Zonaite
Zonaite deposits in the Depths are your primary source of Energy Cells. Smash every ore deposit you see — large Zonaite deposits give the most.
Abandoned Mines
Abandoned mines in the Depths contain Zonai device dispensers. These are the best source of portable Zonai devices for building on the fly.
Gloom Spawn Strategy
Gloom Spawns (Phantom Ganon hands) appear in dark areas. They are terrifying but can be one-shot with a headshot from a strong bow. Alternatively, just run.
Bargainer Statue Locations
There are multiple Bargainer Statues scattered through the Depths. Each new one you find expands the inventory of items available for purchase with Poes.
Surface Chasms
Every chasm on the surface leads to a specific area in the Depths. Mark both ends on your map to create a mental fast-travel network through the underground.
Yiga Clan Hideout Schematics
Each Yiga Clan hideout in the Depths rewards unique Autobuild schematics for Yiga vehicles and weapons. Clear all of them for the complete Yiga Schematic set.
Large Poe Locations
Large Poes (worth 20 regular Poes) spawn in fixed locations near boss arenas and Yiga outposts. Mark them on your map and revisit after each Blood Moon for respawns.
Depths Coliseum Farming
The Coliseum in the Depths contains high-level enemies that drop pristine weapons and rare fuse materials. It resets every Blood Moon, making it a repeatable farm spot.
Lightroot Healing
Standing near an activated Lightroot fully heals Gloom damage over time. If your hearts are Gloom-damaged and you are out of Sundelion meals, find the nearest Lightroot.
Depths Navigation Pattern
The Depths mirror the surface terrain inverted — mountains above become valleys below, and lakes above become elevated plateaus. Use the surface map to predict Depths geography.
Frox Boss Weak Points
Frox bosses have Zonaite ore deposits on their backs. Climb onto them after stunning (hit the eye) and mine the deposits for large Zonaite and Crystallized Charges.
weapons
16 tips
Fuse Everything
Almost any material can be fused to a weapon. Experiment — even mundane items like rocks add durability and damage.
Rock Hammer
Fuse a rock to a weapon to create a hammer that mines ore deposits in one hit. Keep one in your inventory at all times.
Weapon Durability Transfer
When you fuse a material to a weapon, the weapon's durability resets partially. Fuse to extend the life of good weapons.
Shield Fusions
Fuse rockets to shields for instant launches, springs for bouncing, Muddle Buds for confusing enemies on block.
Pristine Weapons
Pristine weapons from the Depths have higher base damage. Farm the Coliseum and Hyrule Castle for the best pristine drops.
Arrow Fusions
Fuse materials to arrows in real-time. Keese Eyeballs make homing arrows. Fire Fruit makes fire arrows. Gibdo Bones one-shot Gibdos.
Long Stick Reach
Fusing a long item like a Lizalfos Horn to a spear creates an absurdly long weapon. The extended reach lets you hit enemies before they can reach you.
Boomerang Fusions
Fuse a material to a boomerang and throw it — the fused material adds damage to the ranged attack. Lizal Boomerangs are great base weapons for this.
Royal Guard Weapons
Royal Guard weapons found in Hyrule Castle have very high attack power but low durability. Fuse a Diamond to one for the best balance of power and longevity.
Unfuse to Recover Materials
Visit Pelison in Tarrey Town to separate fused weapons. This costs 20 rupees but lets you recover rare fuse materials from weapons that are about to break.
Lynel Weapon Tiers
Lynel weapons come in tiers: red, blue, white-maned, silver, and gloom. Silver and Gloom Lynel drops are the strongest fuse materials in the game at +55 attack.
Decay Prevention
Decayed weapons found on the surface have reduced durability and damage. Always fuse something to a decayed weapon immediately — even a basic material restores usefulness.
Master Sword Recharging
The Master Sword breaks but recharges after 10 minutes. Use it as your primary weapon and switch to fused weapons while it recharges. It gains bonus damage against Gloom enemies.
Bow Durability Conservation
Bows lose durability per shot, not per hit. Use multishot bows like the Savage Lynel Bow sparingly on single targets. Save them for large enemies where every arrow connects.
Ruby and Sapphire Fusions
Fuse a Ruby to a weapon for fire attacks or a Sapphire for ice attacks. These create elemental weapons without consuming arrows, perfect for exploiting enemy weaknesses.
Zonai Cannon Shield
Fuse a Beam Emitter to your shield. When you block, it fires an energy beam at the attacker. This gives you ranged damage output while playing defensively.
general
16 tips
Welcome to Hyrule
I'm Maren, your guide through Tears of the Kingdom. I'll share tips based on what section of the guide you're exploring.
Save Often
TotK autosaves, but manual saves before tough fights or risky exploration can save you a lot of frustration. Use multiple save slots.
Talk to Everyone
NPCs give side quests, tips, and sometimes rare items. Talk to everyone at stables, villages, and especially wandering travelers.
Upgrade Your Battery
Visit Crystal Refineries at Lookout Landing and other locations to upgrade your Energy Cell. More battery = longer Zonai device usage.
Autobuild Favorites
Save your best Zonai builds as Autobuild favorites. You can rebuild them anywhere for just Zonaite, even without the original parts.
Amiibo Daily
Scan Amiibo once per day for free materials, weapons, and exclusive armor. Zelda-series Amiibo give the best drops.
Rupee Priorities
Early game, sell gems and cooked meals for rupees. Mid-game, farm Blupees and sell rare materials. Late-game, the Depths Zonaite-to-rupee loop is most efficient.
Photo Compendium
Take photos of every creature, material, weapon, and enemy you encounter. A filled Compendium lets you use Sensor+ to track anything in the world.
Great Fairy Fountains
There are four Great Fairy Fountains that upgrade your armor. You need to complete side quests involving the Stable Trotters musicians to unlock each one.
Fast Travel is Free
Teleporting to any shrine, Skyview Tower, or Lightroot costs nothing. Use it constantly. There is no penalty for fast traveling.
Pick Up Everything
Materials respawn every Blood Moon. Grab every mushroom, mineral, plant, and critter you see. Your inventory for materials is unlimited, so there is no reason not to hoard.
Stable Side Benefits
Every stable offers a free bed, a cooking pot, a horse registration desk, and unique NPCs with quests. Make stables your base of operations while exploring each region.
Goddess Statue Respec
The Goddess Statue in Lookout Landing lets you trade heart containers for stamina vessels and vice versa for 20 rupees. You can respec your health and stamina at any time.
Blood Moon Respawns
Every Blood Moon respawns all enemies, ore deposits, treasure chests, and materials in the world. Plan your farming routes around Blood Moon cycles for maximum yield.
Purah Pad Upgrades First
Complete Robbie and Josha quests early to unlock Sensor+, Travel Medallion, and Hero Path Mode. These quality-of-life upgrades make everything else easier.
Use Pro HUD Mode
Switch to Pro HUD in settings to remove the minimap and HUD clutter. You can still open the full map with minus. This improves immersion and forces better navigation skills.
horses
15 tips
Catch Wild Horses
Sneak up on wild horses and press A to mount them. Mash L to soothe them until they calm down. Higher stamina lets you soothe tougher horses.
Horse Stats Matter
Each horse has Strength, Speed, Pull, and Stamina stats. Solid-colored horses tend to have better stats than spotted ones. Check stats at any stable.
Giant Horse Location
The Giant Horse is found in the Taobab Grassland south of the Great Plateau. It has maximum strength but cannot gallop. Register it for a unique steed.
Stalhorse at Night
Stalhorses appear at night in certain areas like the Tabantha region. You can ride them but not register them at stables. They vanish at dawn.
Towing Harness
Equip the Towing Harness at a stable to let your horse pull Ultrahand-built carts and wagons. This turns your horse into a pack animal for moving large loads.
Horse Armor
Visit the stable at Highland Stable and complete quests to unlock horse armor and bridles. These are cosmetic but some offer minor stat bonuses.
Pony Points
Register horses, stay at stables, and help the stable NPCs to earn Pony Points. Accumulate enough points at any stable to unlock the Towing Harness, Horse Armor, and other rewards.
Horse God Malanya
Find the Horse God Malanya near the Horse God Bridge south of Highland Stable. Malanya can revive any horse that has died, so do not worry about losing your favorite mount.
Whistle Sprint
Tap the whistle button repeatedly while sprinting on foot to move faster without consuming stamina. This also works to call your horse from a distance.
Ancient Saddle Teleport
With the Ancient Saddle equipped (from the Zelda Amiibo or DLC in BotW save data), you can teleport your horse directly to your location from anywhere in the overworld.
Golden Horse Quest
The Golden Horse is found during the side quest at Snowfield Stable. It has balanced stats and a unique golden appearance. Complete the quest chain to register this rare mount.
Horse Bond Increases
Feed your horse apples or carrots and soothe it while riding to increase your bond. Maximum bond means the horse responds to all commands instantly and never bucks you off.
Horseback Combat Tips
You can use melee weapons and bows while riding. Spears have the best reach from horseback. Time your swings as you pass enemies for devastating drive-by attacks.
Towing Cart Designs
Build a flat platform with rails using Ultrahand, attach it to the Towing Harness, and load it with materials or items. Horses can tow surprisingly large loads across flat terrain.
Five-Star Speed Horses
The fastest horses spawn in the Akkala Highlands and the Upland Lindor area. Look for solid-colored horses with lean builds. A five-star speed horse outruns everything in the game.
building
17 tips
Start Simple
You do not need complex vehicles. A platform with one fan moves forward. Two fans go faster. Add a steering stick for control. Master basics before going big.
Ultrahand Precision
Hold ZL while rotating an object with Ultrahand to snap it to 45-degree angles. This makes aligning wheels, fans, and platforms much easier.
Save Autobuild Schematics
Every time you build something useful with Ultrahand, it is saved in your Autobuild history. Star your best designs so they do not get pushed out by new builds.
Zonai Device Dispensers
Find Zonai Device Dispensers on sky islands and in the Depths. Insert Zonai Charges to get random devices. Each dispenser stocks different device types.
Battery Management
Large builds drain your Energy Cell fast. Upgrade your battery with Crystallized Charges at Crystal Refineries. Prioritize battery upgrades if you love building.
The Classic Hoverbike
Attach two fans in a V-shape to a steering stick. This hoverbike is cheap, fast, and works everywhere. It is the single most useful build in the game.
Beam Emitter Turrets
Attach Beam Emitters to a stationary platform and activate them to create an automated turret. Great for defending a position or softening enemies before you engage.
Rocket Shield Launch
Fuse a Rocket to your shield, then shield-surf to launch straight into the sky. This is the fastest way to gain altitude without a Skyview Tower.
Floating Platforms
Attach a balloon to any platform and place a Flame Emitter underneath. The hot air inflates the balloon and lifts the platform. Add fans for horizontal movement.
Mine Cart Vehicles
Mine carts found in the Depths can be used as vehicle bases. Attach fans to a mine cart and ride the rails or detach and drive overland.
Stabilizer Trick
Attach a Stabilizer to any build to keep it level and prevent tipping. Essential for tall constructions or anything that needs to stay upright on rough terrain.
Combat Mech Design
Build a walking mech by attaching legs, Beam Emitters, and a steering stick to a flat base. Activate it and ride on top for a mobile weapons platform that walks over rough terrain.
Wing Glider Long Range
Zonai Wings launched from rails or slopes glide enormous distances. Attach a fan for thrust and a steering stick for control. Perfect for crossing canyons and reaching sky islands.
Frost Emitter Traps
Place Frost Emitters facing a doorway or choke point and activate them. Enemies that walk through get frozen solid, letting you shatter them with a single heavy hit.
Bridge Over Everything
Need to cross a gap? Ultrahand two or three logs together to make a bridge. This brute-force approach solves dozens of puzzles and exploration challenges throughout the game.
Wheel-Based Land Vehicles
Four Big Wheels on a flat platform with a steering stick creates a durable car. Add a Beam Emitter on front for offense. Wheels handle rough terrain better than sleds.
Autobuild From History
Even if you did not star a build, it stays in your Autobuild history for a while. Scroll through recent builds to reconstruct something you forgot to favorite.
armor
17 tips
Set Bonuses at Level 2
Wearing all three pieces of an armor set and upgrading each to level 2 at a Great Fairy unlocks the set bonus. This bonus is often more powerful than the base stats.
Stealth Armor Priority
The Stealth Set from Kakariko Village is one of the best early-game purchases. The set bonus increases stealth massively, making sneakstrikes and bug-catching trivial.
Climbing Gear Locations
The Climbing Gear is split across three locations: Ploymus Mountain cave, North Hyrule Plain cave, and Upland Zorana. The full set bonus lets you climb faster with less stamina.
Barbarian Armor for DPS
The Barbarian Armor set boosts attack power. Find the pieces in the Depths — the Crenel Hills, Solewood Range, and East Akkala Plains Chasms lead to them.
Gloom Resistance Armor
The Depths Armor set provides gloom resistance, making Depths exploration much safer. Trade Poes at Bargainer Statues to acquire each piece.
Rubber Armor vs Lightning
The Rubber Armor set provides shock resistance and the set bonus makes you unshockable. Essential for Thunderstorms and fighting shock-based enemies like Electric Lizalfos.
Flamebreaker for Eldin
Buy Flamebreaker Armor in Goron City before exploring Death Mountain or Eldin. Without flame resistance, you will literally catch fire near lava and volcanic areas.
Snowquill for Cold
The Snowquill Set from Rito Village provides cold resistance. With the full set bonus at level 2, you can survive the coldest areas in Hyrule without needing food buffs.
Desert Voe for Heat
Buy the Desert Voe Set in Gerudo Town for heat resistance. You need the full set to survive the hottest areas of the Gerudo Desert without constantly eating cooling food.
Dye Your Armor
Visit the Kochi Dye Shop in Hateno Village to change the color of any armor piece. It costs 20 rupees plus specific materials. Mix and match for your own style.
Mystic Armor Rupee Trick
The Mystic Armor set converts damage to rupee loss instead of heart damage. If you are flush with rupees, this can make you nearly invincible in combat.
Fairy Fountain Unlock Order
Unlock Great Fairy Fountains in order: the first is free, the second costs 500 rupees, the third 1000, and the fourth 10000. Plan your rupee budget around this progression.
Zonaite Armor for Building
The Zonaite Armor set reduces Energy Cell drain when using Zonai devices. If you build vehicles and machines constantly, this set pays for itself in extended battery life.
Upgrade Material Planning
Check upgrade requirements at the Great Fairy before farming. Many Level 3 and 4 upgrades need rare dragon parts or star fragments. Plan your dragon farming routes accordingly.
Soldier Armor for Defense
The Soldier Set from Hateno Village offers the highest raw defense in the game when fully upgraded. No set bonus, but pure defense numbers make it ideal for tough boss fights.
Radiant Armor Bone Attack
The Radiant Set from Gerudo Town glows in the dark and provides a bone attack boost. Stals and skeleton enemies treat you as one of their own, making Depths travel safer.
Froggy Armor in Rain
The Froggy Armor set from Koltin grants slip resistance when climbing in rain. This single set eliminates the most frustrating mechanic in the game for climbers.
quests
16 tips
Main Quest Order
You can tackle the four regional phenomena in any order. Rito Village (Wind Temple) is generally easiest first, giving you Tulin's gust ability for exploration.
Side Adventure Rewards
Side Adventures are longer quest chains that often reward unique armor, weapons, or abilities. Prioritize them over standard side quests for better payoffs.
Addison Sign Quests
President Hudson's signs are scattered everywhere. Help Addison hold them up using Ultrahand builds for easy rupees and a random food reward each time.
Lucky Clover Gazette
Visit the Lucky Clover Gazette near Rito Village to start the Geoglyph quest chain. Finding all 12 Geoglyphs and their Dragon Tears reveals the full backstory of the game.
Koltin Bubbul Gems
Trade Bubbul Gems to Koltin (found near stables at night) for exclusive armor pieces. Every cave has one Bubbulfrog — collect them all for the full Froggy Armor set.
Tarrey Town Rebuild
Complete the Tarrey Town quests to unlock Hudson Construction. This gives you access to Pelison who can unfuse weapons, and a wedding that rewards a Diamond Circlet.
Hestu's Maracas
Find Hestu near Lookout Landing early in the game. Trade Korok Seeds to expand your weapon, bow, and shield inventory slots. Prioritize bow slots first.
Stable Trotters Musicians
The Great Fairy quest chain requires you to bring the Stable Trotters band members to each fairy fountain. Each musician is found at a different stable.
Lurelin Village Rebuild
After visiting the destroyed Lurelin Village, complete the rebuilding quest chain to restore the village. The reward is access to a gambling mini-game that can be quite profitable.
Master Sword Location
The Master Sword is embedded in the Light Dragon that flies across Hyrule. You need two full stamina wheels to pull it out. Track the dragon and land on its head.
Robbie's Research
Complete Robbie's quests at the Hateno Ancient Tech Lab to upgrade your Purah Pad with Shrine Sensor, Travel Medallion, and Hero's Path Mode. All are essential tools.
Addison Sign Reward Tracking
There are over 70 Addison signs across Hyrule. Completing all of them rewards the Fabric for your paraglider. Each sign also gives rupees and a random cooked dish on the spot.
Josha Depths Expedition
Talk to Josha at Lookout Landing to start the Depths exploration quest chain. This leads to essential Purah Pad upgrades and reveals key Depths lore about the Zonai civilization.
Hateno Village Mayoral Race
Complete the Hateno Village mayoral election quest chain to unlock the Hateno School and its associated side quests. The quest rewards unique dialog and a special item.
Monster Control Crew
Find Kilton and his brother Koltin at stables after dark. Kilton buys monster parts for Mon currency, and Koltin trades Bubbul Gems for rare armor. Visit both regularly.
Sage Will Collectibles
Sage Wills are rare collectibles found in the Depths. Collect four of the same type and bring them to a Goddess Statue to permanently upgrade that Sage companion's damage.
memories
8 tips
Dragon Tear Geoglyphs
There are 12 Geoglyphs scattered across Hyrule, each containing a Dragon Tear memory. View them in order for the full story of Zelda's transformation and the ancient Zonai war.
Geoglyph Viewing Angle
Geoglyphs are only visible from above. Launch from a nearby Skyview Tower or build a flying machine to spot the glowing tear puddle at the center of each Geoglyph drawing.
Memory Chronological Order
The memories are numbered 1-12 and tell the story in chronological order. Start with the Geoglyph near Lookout Landing and follow the Lucky Clover Gazette hints for the rest.
Master Sword Memory
The 18th and final memory is unlocked by pulling the Master Sword from the Light Dragon. This memory reveals the complete ending of Zelda's backstory and her ultimate sacrifice.
Geoglyph Map from Impa
Complete Impa's quest at New Serenne Stable to receive a map marking all 12 Geoglyph locations. This saves hours of searching and ensures you do not miss any Dragon Tears.
Geoglyph Tear Detection
Each Geoglyph has a glowing tear puddle somewhere on its surface. Glide over the Geoglyph slowly and look for the golden shimmer. It is always within the bounds of the drawing.
Story Impact of Order
Watching memories out of order still works, but the emotional payoff is much stronger in sequence. The final reveal about the Light Dragon hits hardest if you have seen memories 1 through 11 first.
Forgotten Temple Connection
After viewing all 12 Dragon Tear memories, visit the Forgotten Temple for a bonus cutscene. This location also contains the full Geoglyph mural that ties the visual story together.
sages
10 tips
Tulin Wind Ability
Tulin creates a powerful gust of wind on command. Use it to boost paraglider distance, push sail rafts, and extend jumps across wide gaps. Best sage for exploration.
Yunobo Rolling Attack
Yunobo charges forward in a fireball that smashes rocks, ore deposits, and enemies. Aim him at destructible walls and cave blockages to reveal hidden passages.
Sidon Water Shield
Sidon creates a water barrier that absorbs one hit and adds a water-slash to your next attack. The water slash can extinguish fire enemies and boost damage on electric ones.
Riju Lightning Strike
Riju creates a lightning field that activates on your next charged attack. This hits every enemy in range, making it the best sage ability for clearing enemy camps in one strike.
Mineru Mech Suit
Mineru's sage ability lets you pilot a Construct mech. Fuse weapons to its arms for powerful melee attacks. The mech is immune to Gloom damage, making it essential in the Depths.
Sage Ability Cooldowns
Each sage ability has a cooldown after use. Position yourself near the sage avatar and press A when the icon appears. The cooldown is shorter than it feels — keep track of it mid-combat.
Sage Combo Strategies
Combine Riju's lightning with a two-handed spin attack to electrocute an entire camp. Follow up with Tulin's gust to scatter survivors, then pick them off with Yunobo charges.
Toggle Sages On and Off
You can disable individual sages in the Key Items menu. Turn off sages you do not need to prevent their avatars from getting in the way during precise Ultrahand building.
Sage Will Upgrades
Collect four Sage Wills of the same type from the Depths to upgrade that sage's damage. Each sage can be upgraded once, significantly boosting their combat effectiveness.
Mineru for Lava Crossing
Pilot Mineru's mech through lava and Gloom pools without taking damage. Attach springs to the mech's feet for extra bounce, or fans for hovering across hazardous terrain.
photography
8 tips
Fill the Compendium Early
Photograph every new creature, material, weapon, and enemy you encounter. A complete Hyrule Compendium lets you track any item in the world using Sensor+.
Sensor Plus Setup
After unlocking Sensor+ from Robbie, set it to track whatever you need most — Bubbulfrogs for gems, Hearty Durians for cooking, or rare ores for rupee farming.
Buy Missing Compendium Entries
Robbie sells Compendium photos for items you missed. Each costs 100 rupees. If an enemy variant is gone or seasonal, buying the photo is easier than hunting it down.
Selfie Mode Secrets
Switch to selfie mode on the Purah Pad camera and point it at certain murals, stone tablets, and Zonai ruins. Some contain faint text only visible through the camera viewfinder.
Dragon Part Photography
Photograph each dragon's body parts separately — horn, fang, claw, and scale all count as different Compendium entries. Fly alongside dragons and snap each part close-up.
Weapon Photography Before Breaking
Always photograph rare or unique weapons before they break. Some pristine weapons and boss drops are hard to find again, and having them in the Compendium lets you track them.
Compendium Progress Check
Open the Compendium and look for blank entries by category. Each category shows total vs discovered counts. Focus on the category with the most missing entries to complete first.
Night Photography for Rare Entries
Some Compendium entries only appear at night — Stalnox, Stalmoblin, luminous stones glowing, and nocturnal bugs. Do a dedicated night photography run to fill those gaps.
minigames
8 tips
Lurelin Village Gambling
After rebuilding Lurelin Village, the treasure chest gambling game lets you pick one of three chests. Save before playing and reload if you lose — the outcome is fixed per save.
Eventide Island Challenge
Eventide Island strips all your gear when you arrive. You must survive with found items and defeat three Hinoxes to complete the challenge. Bring your best combat knowledge, not gear.
Shield Surf Racing
Talk to Selmie at the Selmie's Spot lodge in Hebra for shield surfing time trials. The advanced course rewards rare gems. Use a cheap wooden shield — shield surfing wears out durability fast.
Archery Camp Practice
Visit the mounted archery camp in the Faron region to practice horseback archery. High scores earn valuable prizes. Use a multishot bow for easier target hits.
Zonai Device Golf
Some sky islands feature ball-launching puzzles that play like golf. Use Ultrahand to aim and Recall to adjust mid-flight. Getting the ball in the hole rewards treasure chests.
Dragon Farming Loop
Dragons fly set paths on a timer. Learn the Light Dragon, Naydra, Dinraal, and Farosh routes to intercept them for horn shards, claws, fangs, and scales. Set Sensor+ to track them.
Cucco Attack Survival
Attack a Cucco near a village and survive the swarm for as long as possible. This is not an official minigame but it is a Zelda tradition. The Cuccos deal real damage, so bring food.
Sky Dive Ring Challenges
Multiple sky islands feature ring-dive challenges where you free-fall through rings to earn rewards. Aim for the center of each ring for bonus points. Use Tulin's gust for mid-air corrections.
secrets
10 tips
Hidden Rare Ore Deposits
Luminous Stone deposits glow at night, making them easy to spot in dark areas. Sell Luminous Stones for 70 rupees each, or trade 10 to a Zora NPC for a Diamond.
Satori Mountain Lord
When Satori Mountain glows green at night, the Lord of the Mountain appears at the peak. You can mount it but not register it. It is the fastest rideable creature in the game.
Star Fragment Farming
Star Fragments fall from the sky at night and land with a beam of light. Mark where they land on your map and collect them at dawn. They are needed for top-tier armor upgrades.
Zonai Ruins Lore
Read every Zonai stone tablet you find in the sky islands. They tell the backstory of Rauru and Sonia's civilization, filling in gaps that the main memories do not cover.
Hot Spring Heart Recovery
Stand in any natural hot spring to slowly recover hearts for free. Several hot springs exist in the Eldin and Akkala regions. Combine with a cooking pot nearby for an efficient rest stop.
Hidden Hyrule Castle Armory
Hyrule Castle contains a hidden armory with Royal Guard weapons that respawn every Blood Moon. Enter through the docks or the underground passages to reach it safely.
Dinraal Fire Updraft
Stand near Dinraal (the fire dragon) to generate a massive updraft. Open your paraglider to ride it to extreme heights. This is one of the fastest ways to reach high sky islands.
Korok Mask Detection
The Korok Mask shakes when you are near a hidden Korok puzzle. Wear it while exploring to detect Koroks you would otherwise walk right past. Found in the Depths.
Tarrey Town Hidden Shop
After completing all Tarrey Town quests, a hidden vendor appears selling rare armor dyes and exclusive items not available elsewhere. Check the town at night for the full vendor list.
Blood Moon Countdown
A Blood Moon occurs every 2 hours and 48 minutes of real-time gameplay. The sky turns red at 11 PM in-game and enemies respawn at midnight. Plan farming runs around this cycle.
Maren's Outfits
Maren changes her outfit based on the region you're browsing — just like any smart Hylian explorer.
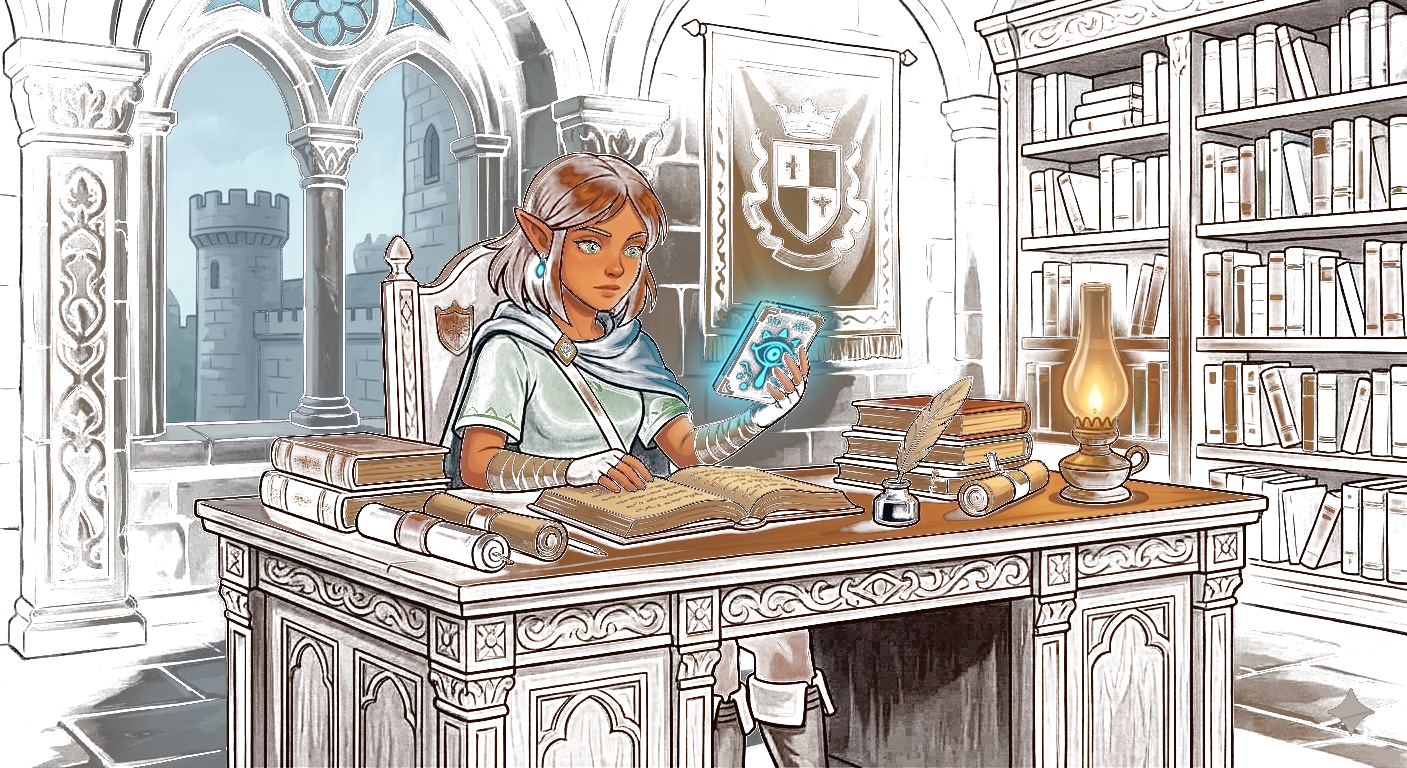
Archivist (Default)
Standard gear for general exploration and cataloging
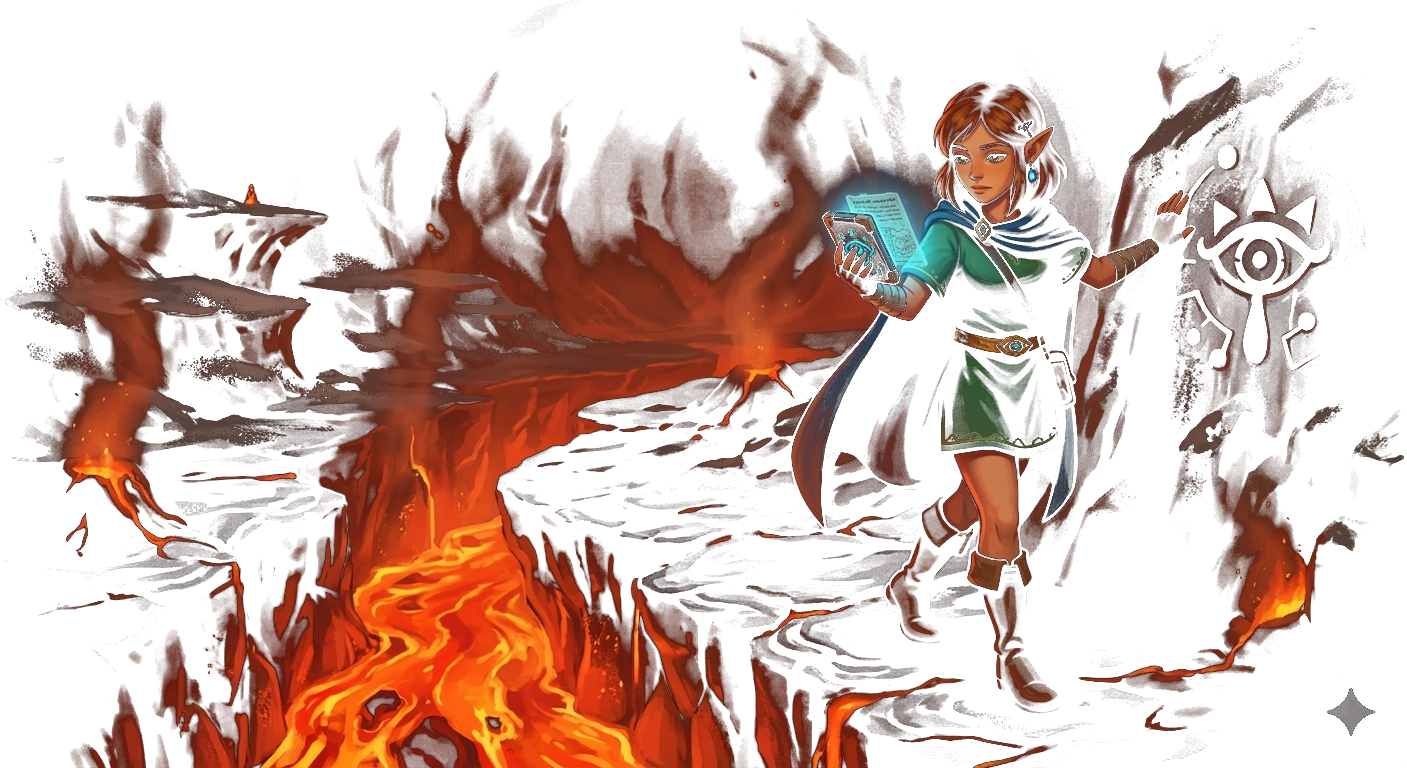
Depths Explorer
Dark-adapted suit for Lightroot hunting and Gloom zones

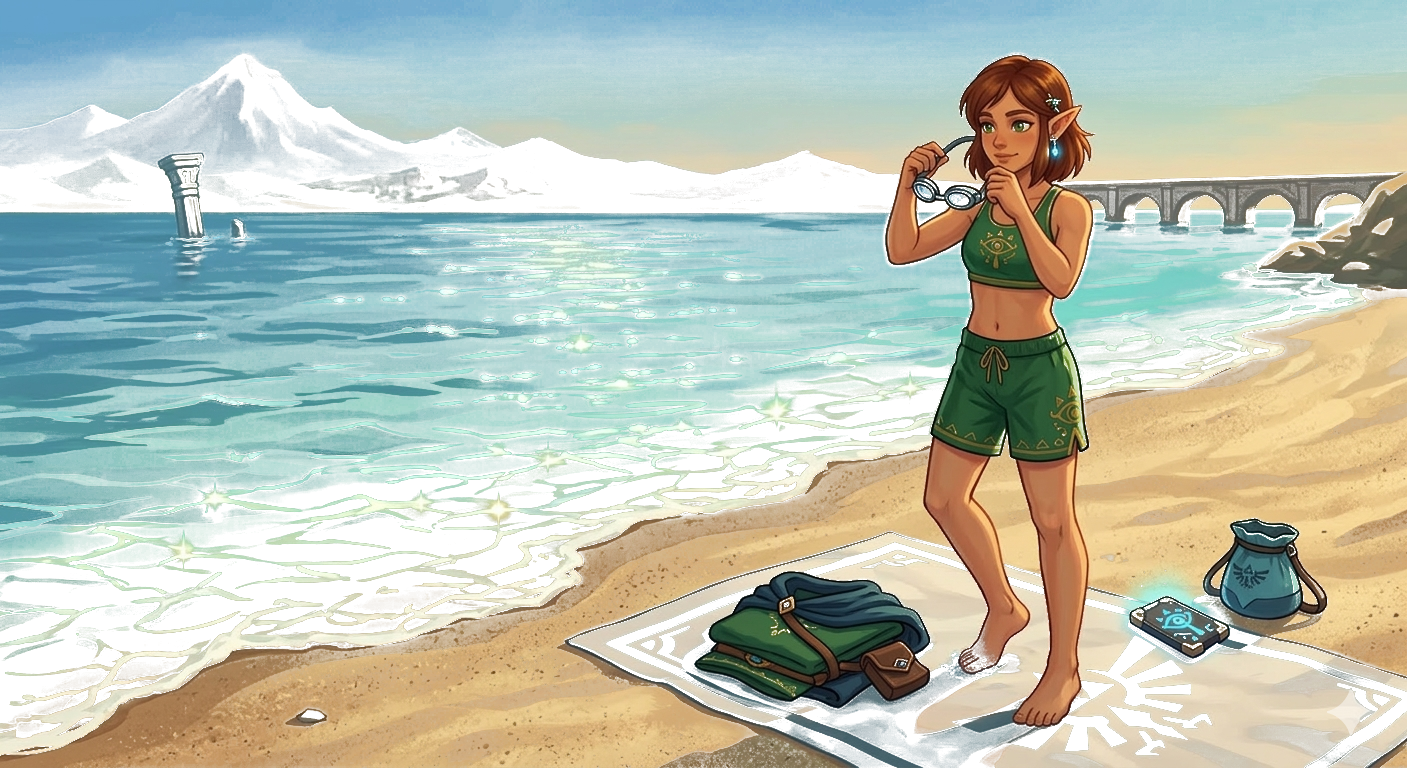
Snowquill Outfit
Cold-resistant gear for Hebra and Tabantha regions
Desert Voe Outfit
Heat-resistant attire for Gerudo Desert and Eldin
Rubber Outfit
Waterproof gear for Zora's Domain and Lanayru
Maren's Archive
Collectible lore entries from Maren's research across Hyrule.
#001
The Zonai Connection
The Zonai civilization existed thousands of years before Hyrule. Their technology powered by Secret Stones connects directly to the Tears of the Kingdom. Maren believes the Zonai devices scattered across the Depths are fragments of their ancient cities.
— From Maren's Archive
#002
Lightroot-Shrine Mirror
Every single Lightroot in the Depths sits directly below a shrine on the surface. Their names are the shrine names spelled backwards. This was Maren's breakthrough discovery during her Depths expedition.
— From Maren's Archive
#003
Blood Moon Mechanics
Blood Moons occur every 2 hours and 48 minutes of real-time gameplay. They reset all defeated enemies and breakable objects. Cooking during the Blood Moon window (11:30 PM - midnight) guarantees critical success.
— From Maren's Archive
#004
The Fifth Sage
The Spirit Temple reveals the fifth sage — Mineru, a Zonai who preserved her spirit across millennia. Her construct is the only sage companion that can be ridden, making her invaluable for Depths exploration.
— From Maren's Archive
#005
Dragon Flight Paths
The three dragons — Dinraal, Naydra, and Farosh — follow fixed circular flight paths. Dinraal circles Eldin and Akkala, Naydra patrols Lanayru and Mount Lanayru, and Farosh travels through Faron and Gerudo Highlands.
— From Maren's Archive
#006
Weapon Durability Secret
Fused weapons inherit the durability of whichever component has MORE durability. This means fusing a nearly-broken weapon with a fresh Rock Octorok-repaired weapon gives you full durability on the fused result.
— From Maren's Archive
Explorer Badges
Archive Visitor
You found Maren's personal page!
Cartographer
Explore the interactive map
Combat Scholar
Read 10+ weapon guides
Master Chef
Browse the full recipe catalog
Depths Diver
Explore the Depths guide
Shrine Seeker
Check all 152 shrines
Your Exploration Log
0 pages visited
Guide Coverage
⛩️
Shrines
152
⚔️
Weapons
358
👹
Enemies
275
🐉
Bosses
63
📜
Quests
230
🧪
Materials
224
📍
Locations
262
🛡️
Armor
61
📖
Guides
341
Maren tracks your exploration automatically as you browse
Did You Know?
Shooting a star fragment out of the sky with an arrow is possible, but the timing is incredibly precise.
Test Your Knowledge
Think you know Hyrule? Maren has prepared 90 questions across 6 categories.
Maren's Quiz
General Knowledge — Question 1 of 15
How many shrines are there in Tears of the Kingdom?
Maren's Quiz
Combat — Question 1 of 15
What triggers a Flurry Rush?
Maren's Quiz
Cooking — Question 1 of 15
When does Blood Moon cooking give guaranteed crits?
Maren's Quiz
Exploration — Question 1 of 15
How many Skyview Towers are there?
Maren's Quiz
The Depths — Question 1 of 15
What reverses Gloom damage to your hearts?
Maren's Quiz
Zonai Devices — Question 1 of 15
What Zonai device lets you fly?
Frequently Asked Questions
Who is Maren?
Maren is a custom character created for Hyrule Archive. She is a Hylian archivist and scholar who serves as your personal guide through Tears of the Kingdom, offering contextual tips, lore, and strategies on every page of the site.
Is Maren an official Zelda character?
No. Maren is an original character designed exclusively for the Hyrule Archive guide. She is not part of Nintendo's official Zelda canon. She was created to give the guide a friendly, in-world companion feel.
What does the archivist do in Hyrule Archive?
Maren appears across the site with contextual tips based on the page you are viewing. She provides shrine strategies, cooking advice, combat tips, Depths exploration guidance, and collectible lore cards drawn from her research across Hyrule.
Can I interact with Maren?
Yes! Click the fairy companion button in the bottom-right corner of any page to hear Maren's tips about the content you are viewing. She also hosts quizzes, fun facts, and tracks your exploration progress.
What are Maren's Slate Games?
Slate Games are free browser-based minigames hosted on Hyrule Archive. They include Basketball, Korok Puzzle, and Shrine Rush — all themed around Tears of the Kingdom and playable directly in your browser.
The Archivist's Story
Maren was once a researcher at the Royal Ancient Lab in Hateno Village, working alongside Purah and Robbie on Sheikah technology. When the Upheaval shattered the landscape, she set out on her own — determined to document every shrine, every Zonai device, every recipe that could help travelers survive.
Armed with a modified Purah Pad (hers has extra storage for field notes), a green scholar's tunic, and a blue travel cape, Maren traverses all three layers of Hyrule. She's spoken with every stable keeper, mapped Lightroot locations by triangulating shrine positions, and personally taste-tested over 200 recipes.
Now she shares her knowledge with you. Click the fairy button in the bottom-right corner of any page to hear what Maren has to say about where you are.