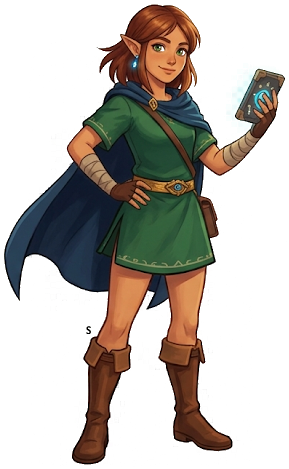
Tri Force Heroes
Princess Styla of Hytopia has been cursed with an unremovable onesie. Three Links must cooperate in the Drablands — a haunted wilderness outside the city — to collect Lady Maud's 8 magical outfits and break the curse. Outfits grant powerful bonuses; crafting the right outfit for each area is the core strategy system.
Totem Mechanic
Three Links stack vertically — bottom carries middle, middle carries top. Top Link attacks at height and can be launched upward as a projectile. Many dungeon puzzles require all three to stand on pressure plates simultaneously, or the top Link to be launched to unreachable switches. In multiplayer, coordinate via emotes (there is no voice chat). In single-player, control all three via Doppelgangers (AI partners that can be directed with items).
All 8 Areas
Woodlands
Recommended: Kokiri Clothes (bomb power up) / Sword Master Suit (attack up)
Tutorial area. Introduces Totem stacking and the Doppel system. Forest enemies are weak to bombs — Kokiri Clothes outfit doubles bomb blast radius.
Boss — Lady Maud (Forest Form): Lady Maud summons a forest spirit form that shoots leaf projectiles in 4 directions. Stack into a 3-Totem and attack from above her reach. She descends to ground level periodically — hit her head when she lowers. Phase 2 she adds homing leaf clusters — use Water Rod to create water barriers that slow the projectiles.
Volcano
Recommended: Goron Garb (fire immunity) / Cacto Clothes (thorns damage)
Lava floors require Goron Garb or careful jumping. Totem formation protects the bottom Links from lava splashes when top Link activates switches.
Boss — Lady Maud (Fire Form): Fire Form Maud creates a ring of lava geysers that cycle clockwise. Position the 3-Totem in the gap between two active geysers, then attack her when she passes overhead. In phase 2 the geysers speed up — time your Totem repositioning to the gap rhythm.
Ice Cavern
Recommended: Cozy Parka (ice immunity) / Hammerwear (hammer power)
Slippery ice floors affect movement. Stack Totems carefully — sliding while stacked causes topples. Ice pillars must be destroyed with Hammerwear or fire items.
Boss — Lady Maud (Ice Form): Ice Form Maud freezes Links on contact. Avoid her freeze beam and attack with the top Link of a Totem while the bottom Links hold position. When she creates ice clone decoys, throw a bomb to identify the real one (real Maud cannot be destroyed by bombs, only stunned).
Riverside
Recommended: Zora Suit (swim speed) / Gust Garb (wind)
Water currents push Links — coordinate movement with all three Links to avoid separation. Water dungeon requires swimming to floor switches only reachable underwater.
Boss — Lady Maud (Water Form): Water Form Maud creates whirlpools that pull Links toward damage zones. Stack Totem in the center of the arena and let the current rotate around you — attack Maud as she orbits the central pillar. Deploy Water Rod to create platforms that resist current pull.
Fortresses
Recommended: Stealth Suit (silent) / Streetpass Outfit (visitor buffs)
Enemy patrol routes must be memorized. Shadow Form dungeons have reduced visibility. Stealth Suit allows passing enemies without detection.
Boss — Lady Maud (Shadow Form): Shadow Form Maud is partially invisible. Watch for ground shadows to track her position. Stack Totem and attack where the shadow is densest. Phase 2 she duplicates her shadow — only the one casting a slightly different shadow angle is real.
Sky Realm
Recommended: Tingle Tights (float) / Energy Gear (SP regen)
Cloud platforms disappear after being stepped on — plan routes before crossing. Wind gusts push Links off platforms — coordinate jumps between gusts.
Boss — Lady Maud (Wind Form): Wind Form Maud creates tornado pillars around the arena edge. The safe zone shifts — follow Maud into the next safe zone and attack. Phase 2 all platforms disappear and Links must use Totem launch ability to reach Maud as she flies overhead — top Link is launched upward to strike her.
Den of Trials
Recommended: Any — best outfit for current floor element
40-floor endurance gauntlet unlocked after completing all 6 main areas. Each set of 10 floors uses one area's element and enemies. No mid-dungeon saves.
Boss — All bosses (rotating): Floors 1-10: Woodland enemies. Kokiri Clothes recommended. Floors 11-20: Volcano — Goron Garb. Floors 21-30: Ice/Water mix — Cozy Parka + Zora Suit alternating. Floors 31-40: Sky/Shadow — Energy Gear for SP recovery. Boss floors every 10 floors repeat the main area bosses in sequence but with 50% higher HP.
Hytopia Castle
Recommended: Legendary Dress (all stats up — requires Den of Trials completion)
Final dungeon. All 6 area elements are combined. Requires mastery of all game mechanics simultaneously. Legendary Dress is the optimal outfit for this area.
Boss — The Lady Maud (True Form): True Form Maud cycles through all 6 elemental phases from previous fights in rapid succession. The transition between phases is the only vulnerability window. Stack Totem and attack during phase transitions — she is briefly vulnerable for exactly 2 seconds between each form change. Total of 6 transition windows required.
Essential Outfits
Craft outfits at Madame Couture's shop in Hytopia using materials from Drablands chests. Higher-rarity materials require S-rank dungeon completions.
Kokiri Clothes
Bomb blast radius doubled
Materials: Kokiri Emerald x3 + Monster Horn
High — critical for Woodlands and any bomb puzzle area
Goron Garb
Immunity to fire/lava damage
Materials: Goron Ore x3 + Armos Spirit
Required — Volcano area is impossible without it
Zora Suit
Swim at full speed, no water slowing
Materials: Zora Scale x3 + Jelly Blob
High — Riverside dungeons and any water traversal
Cozy Parka
Immunity to ice/freezing
Materials: Warm Pelt x3 + Monster Horn
Required — Ice Cavern area freezing prevented
Sword Master Suit
Attack power +1 to all attacks
Materials: Crimsonine x3 + Jelly Blob
High — general use, excellent for boss fights
Legendary Dress
All stats increased, immunity to all elements
Materials: Crimsonine x5 + Chillshroom x5 + Armos Spirit x3
Best in game — Den of Trials required for materials
Energy Gear
SP (item energy) recharges faster
Materials: Supple Leaf x3 + Monster Horn
High — Sky Realm and Den of Trials floors 31-40
Hammerwear
Hammer deals 2x damage, breaks ice instantly
Materials: Maiamai x10 + Hytopian Silk
Situational — Ice Cavern and specific fortress puzzles
Join the Hyrule Archive Discord
Discuss guides, share discoveries & help build the archive
v1.0.0-rc1 · Build #435 · unknown:unknown · 6/3/2026, 9:06:26 PM